Saturday, March 16, 2013

The Tuffet

My DD and I have been wanting to make The Tuffet for a couple of years.  We bought the pattern at the Sewing Expo in Puyullup then.  The pattern is by Myra Mitchell.  I believe her quilt shop in in Bellevue, Washington.  I can't see that she has a website (?) but if you search for tuffett and Mitchell you will see some other people's projects.

This project definitely takes some DIY skills and a DIY husband is a plus.  My husband made the bun feet - you can buy the feet, too, if you want.

You can see that it takes quite a bit of materials.  We bought the upholstery batting from a local upholstery shop for a reasonable price.  It is thicker, and you really need it.

Here is the pattern you trace off and use 8 times to go around the tuffett.

We chose to use one piece of fabric to cover two sections of the pattern.  The original makes quite a scrappy look, as you can see from the pattern.  It turned out fantastic, and we were both quite pleased with our tuffetts.  My daughter's doesn't have her bun feet attached yet and I don't have a picture, but hers is yellow and gray fabric, and is very cute.

I used the Parson Grey fabric line for mine (Amy Butlers husbands fabric line).  Here are photos of the completed tuffett.


Thursday, January 17, 2013

Another Minoru!

This is my second Minoru jacket.  The first one that I made in purple had no hood.  We are planning a trip to Ireland in September so I wanted one with a hood.  I have read that Ireland has little sunny weather and lots of cool weather plus rain.  Again I followed Tasia's tutorials so everything is straightforward.  The only thing I did differently on this one was that I added a layer of flannel underlining for a little added warmth.  The flannel was from my stash, as you can see.  I picked up the fabric from Fabric Depot over in Portland. 


Monday, January 7, 2013

2013!

I'm going to try and catalogue my 2013 sewing projects here, so at the end of the year I can see what I've done.  Started out the year making sweatpants for the grandsons.  I used my Ottobre 4/2008, which I have used before, but had to retrace to size 128 for the larger pair and size 92 for the smaller pair.


Tuesday, August 7, 2012

Chanel Jacket Finished!!

Yes, the jacket is done and I am very happy with it.  First I will show you a couple of pictures of the jacket on me.


I ended up with this sort of plain looking trim.  I didn't like the fuzzy look you see on many jackets.  I nixed the pockets also, although upon retrospect, I think I might add side pockets!  Not sure.

One comment I did want to make about sewing the Chanel jacket is about pressing.  I hardly pressed at all until the end!  Most garments that are made we end up pressing almost as much as the actual sewing time, but I think it is a combination of the nature of the fabric and the way the lining is sewed on the fashion fabric.  I did do a thorough pressing at the end and actually did some during the process, but I couldn't see a lot of difference.  Wonder if anyone has a comment on this.

I ended up hand sewing the sleeves in mainly because I didn't want to trim the sleeve seams until I was absolutely sure - so it was hard to find the spot to machine sew amongst the huge amount of excess sleeve allowance that was there.  I actually hand sewed it from the outside on the dress form.

I also put in a zipper, as you can see, which isn't very Chanel,  but I like to sometimes close the bottom 4-5 inches.

Here's the lovely chain I found at Home Depot!!


Monday, July 23, 2012

I am making a Chanel jacket!.  I have long wanted to make one.  I started reading  blogs to get information, especially this one.  I also bought Claire Schaeffer's Couture Sewing Techniques. 

Here is the beginning after cutting the pieces and thread tracing.


Since this boucle shreds up like Shredded Wheat, I put painter's tape around the edges  The lining is machine stitched to each piece.  You must cut each piece with a 1 1/2 inch seam allowance. This next picture shows the inside after stitching the seams together on the thread tracing.  I zigzaged the seams and trimmed them down.  Claire Schaeffer says to 1/4 inch.  I wasn't brave enough to trim mine that close!


The lining material is trimmed and folded and hand stitched.  You can see the result in this picture.


Here's how it is looking on my dress form.


And, finally, with one sleeve pinned on.  I am working on the sleeves now.


I have close to 20 hours work on her so far! 
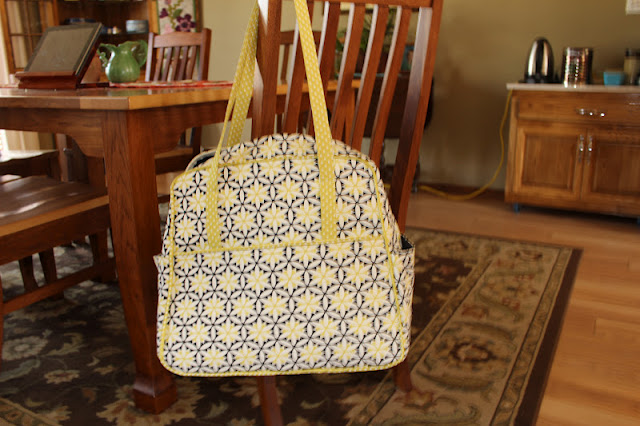
I made the Amy Butler Weekender Bag!  My daughter made one recently, and that inspired me to make mine.  There's lots of hints on the web from people who have made one.  The hardest part is stitching the bag together through all the layers, but Amy Butler says "go slow and be patient" and that does help.  Follow her instructions carefully and everything goes together pretty good.

I do love my new bag!


Friday, May 25, 2012

This is a lap quilt I made for an elderly man. The fabric is from Sweetwater. I wanted a little bit of a scrappy look, but I had a yen to make the log cabin pattern, which I haven't done for many years. I did a simple crosshatch quilting with a soft flannel on the back.